High-Quality Image Resize with Java

Learn a trick to shrink images using the Java2D API, which creates high-quality image icons for your applications.

Image resize with java isn’t a new topic. What I want to explain here is a technique to create small high-quality images using the Java2D API, since I couldn’t find any reasonable solution on the Internet. The are some solutions available – like this one – but the final quality is low.

You can use this approach for different purposes, but the best example I can think of is the implementation of small avatars on web applications (see Nabble, DZone, etc.) or desktop software (e.g., Skype, MSN, etc.).

In order to show the contribution of this technique, I have to explain image resize from the beginning. We will improve the algorithm as we go and I also assume you have some background with Java2D.

Reading and Writing the Image

Since this is a simple example, I will read an image from the file system, resize it and save it back. The image I am using is below. Note that I am using a JPG file, which is the common format for pictures.

picture

To read this image, we can use the ImageIO class:

BufferedImage image = ImageIO.read(new File("c:\picture.jpg"));

First Attempt

Now we have to find a way to resize this image. Our first attempt is to use the drawImage() method of the Graphics interface:

private static BufferedImage resize(BufferedImage image, int width, int height) {
    BufferedImage resizedImage = new BufferedImage(width, height,
    BufferedImage.TYPE_INT_ARGB);
    Graphics2D g = resizedImage.createGraphics();
    g.drawImage(image, 0, 0, width, height, null);
    g.dispose();
    return resizedImage;
}

With this method, we can create a 24×24 avatar by calling:

Image resized = resize(image, 24, 24);
The last step is to save the image so that we can see the results. The ImageIO class can do this job:

ImageIO.write(resized, “png”, new File(“c:\picture1.png”));
Note that the second parameter is the format of the saved image. I used “png” because it is simpler. If you want to save it as JPG, you will have to use the JPEGImageEncoder class (and the result is the same, trust me).

The result of this method is a low-quality image:

picture1

Pay attention to the details of the image (look closer). There is no anti-alias and the face is distorted. Would you add such algorithm to your web application? I don’t think so. Users could get scared by looking at those images.

Second Attempt

We noticed that the main problem of the resize() method above is the fact that it doesn’t have anti-aliasing. So we could use the Rendering Hints of the Java2D API as an attempt to solve that problem:

private static BufferedImage resize(BufferedImage image, int width, int height) {
    int type = image.getType() == 0? BufferedImage.TYPE_INT_ARGB : image.getType();
    BufferedImage resizedImage = new BufferedImage(width, height, type);
    Graphics2D g = resizedImage.createGraphics();
    g.setComposite(AlphaComposite.Src);

    g.setRenderingHint(RenderingHints.KEY_INTERPOLATION,
    RenderingHints.VALUE_INTERPOLATION_BILINEAR);

    g.setRenderingHint(RenderingHints.KEY_RENDERING,
    RenderingHints.VALUE_RENDER_QUALITY);

    g.setRenderingHint(RenderingHints.KEY_ANTIALIASING,
    RenderingHints.VALUE_ANTIALIAS_ON);

    g.drawImage(image, 0, 0, width, height, null);
    g.dispose();
    return resizedImage;
}

The result is below (right image). If you pay attention to the details, it is somewhat better, but still trash:

picture1picture2

Finally, The Trick

Now I will explain how to improve the quality of this image. Basically, the trick is to blur the image before resizing. The code that blurs an image in java is:

public static BufferedImage blurImage(BufferedImage image) {
    float ninth = 1.0f/9.0f;
    float[] blurKernel = {
        ninth, ninth, ninth,
        ninth, ninth, ninth,
        ninth, ninth, ninth
    };

    Map map = new HashMap();

    map.put(RenderingHints.KEY_INTERPOLATION,
    RenderingHints.VALUE_INTERPOLATION_BILINEAR);

    map.put(RenderingHints.KEY_RENDERING, RenderingHints.VALUE_RENDER_QUALITY);
    map.put(RenderingHints.KEY_ANTIALIASING, RenderingHints.VALUE_ANTIALIAS_ON);

    RenderingHints hints = new RenderingHints(map);
    BufferedImageOp op = new ConvolveOp(new Kernel(3, 3, blurKernel), ConvolveOp.EDGE_NO_OP, hints);
    return op.filter(image, null);
}

Since the original image is in the JPG format, we can’t blur it directly. We have to create a compatible image first:

private static BufferedImage createCompatibleImage(BufferedImage image) {
    GraphicsConfiguration gc = BufferedImageGraphicsConfig.getConfig(image);
    int w = image.getWidth();
    int h = image.getHeight();
    BufferedImage result = gc.createCompatibleImage(w, h, Transparency.TRANSLUCENT);
    Graphics2D g2 = result.createGraphics();
    g2.drawRenderedImage(image, null);
    g2.dispose();
    return result;
}

Blurring the image before resizing it isn’t the only trick. You have to do this when the width or height of the image is 100px. Since small avatars are usually a square (width = height), you can resize it to 100×100, call the blur() method and resize again to 24×24:

private static BufferedImage resizeTrick(BufferedImage image, int width, int height) {
    image = createCompatibleImage(image);
    image = resize(image, 100, 100);
    image = blurImage(image);
    image = resize(image, width, height);
    return image;
}

(the resize() method is the one described in the second attempt)

Now you can compare the three results:

picture1picture2picture3

Conclusion

This was my contribution to the tough problem of shrinking images using the Java2D API. I would like to remember that this isn’t the ultimate algorithm to achieve that goal, but it is good enough considering its simplicity. If you have comments or feedback, I would like to hear them.

FULL SOURCE

import sun.awt.image.BufferedImageGraphicsConfig;

import javax.imageio.ImageIO;
import java.awt.Graphics2D;
import java.awt.RenderingHints;
import java.awt.AlphaComposite;
import java.awt.GraphicsConfiguration;
import java.awt.Transparency;
import java.awt.image.BufferedImage;
import java.awt.image.BufferedImageOp;
import java.awt.image.ConvolveOp;
import java.awt.image.Kernel;
import java.io.File;
import java.io.IOException;
import java.util.Map;
import java.util.HashMap;

/**
 * High-Quality Image Resize with Java
 * http://www.componenthouse.com/article-20
 *
 * @author Hugo Teixeira
 */
public class ComponentHouseResizer {

	public static void main(String[] args) {
		try {
			BufferedImage image = ImageIO.read(new File("c:\\picture.jpg"));
			ImageIO.write(resizeTrick(image, 24, 24), "png", new File("c:\\picture3.png"));
		} catch (IOException e) {
			e.printStackTrace();
		}
	}

	private static BufferedImage resize(BufferedImage image, int width, int height) {
		int type = image.getType() == 0? BufferedImage.TYPE_INT_ARGB : image.getType();
		BufferedImage resizedImage = new BufferedImage(width, height, type);
		Graphics2D g = resizedImage.createGraphics();
		g.setComposite(AlphaComposite.Src);
		g.setRenderingHint(RenderingHints.KEY_INTERPOLATION,RenderingHints.VALUE_INTERPOLATION_BILINEAR);
		g.setRenderingHint(RenderingHints.KEY_RENDERING, RenderingHints.VALUE_RENDER_QUALITY);
		g.setRenderingHint(RenderingHints.KEY_ANTIALIASING, RenderingHints.VALUE_ANTIALIAS_ON);
		g.drawImage(image, 0, 0, width, height, null);
		g.dispose();
		return resizedImage;
	}

	private static BufferedImage resizeTrick(BufferedImage image, int width, int height) {
		image = createCompatibleImage(image);
		image = resize(image, 100, 100);
		image = blurImage(image);
		return resize(image, width, height);
	}

	public static BufferedImage blurImage(BufferedImage image) {
		float ninth = 1.0f/9.0f;
		float[] blurKernel = {
				ninth, ninth, ninth,
				ninth, ninth, ninth,
				ninth, ninth, ninth
		};

		Map<RenderingHints.Key, Object> map = new HashMap<RenderingHints.Key, Object>();
		map.put(RenderingHints.KEY_INTERPOLATION,RenderingHints.VALUE_INTERPOLATION_BILINEAR);
		map.put(RenderingHints.KEY_RENDERING,RenderingHints.VALUE_RENDER_QUALITY);
		map.put(RenderingHints.KEY_ANTIALIASING,RenderingHints.VALUE_ANTIALIAS_ON);
		RenderingHints hints = new RenderingHints(map);
		BufferedImageOp op = new ConvolveOp(new Kernel(3, 3, blurKernel), ConvolveOp.EDGE_NO_OP, hints);
		return op.filter(image, null);
	}

	private static BufferedImage createCompatibleImage(BufferedImage image) {
		GraphicsConfiguration gc = BufferedImageGraphicsConfig.getConfig(image);
		int w = image.getWidth();
		int h = image.getHeight();
		BufferedImage result = gc.createCompatibleImage(w, h, Transparency.TRANSLUCENT);
		Graphics2D g2 = result.createGraphics();
		g2.drawRenderedImage(image, null);
		g2.dispose();
		return result;
	}

}

10 Reasons Against Huge Legacy Systems

Despite our best intentions, many of us don’t always get to work on well organized and loosely coupled systems. In some cases, we may need to make our way around a code base that is old and has been written by another team whose quality criteria are not clear. Here you can find 10 reasons why I hate working on huge badly-developed legacy systems:

1 – The system is always growing. If a feature must be extended, developers tend to create new methods or classes just to avoid touching the existing code, which could impact on other (unknown) functionalities.

2 – It is almost impossible to create a new functionality using pure test-driven development. To successfully create code using such technique you must understand exactly what the code must do. If you only create tests for your new implementations (e.g., you create the test of a new method and then create the new method), you will succeed to some extent. But a good practice in TDD is to create tests that check the states of the system, and this is very difficult to achieve when you work on a system that is bad modularized and tightly coupled.

3 – Third-party components might not be supported anymore. When you try to upgrade the system (e.g., from java 1.4 to version 1.5 or a new Look-and-Feel is available) you will probably find out that some third-party components will start to behave strangely (e.g., bad layout, missing funcionality, etc). This gets even worse when you don’t have the source code and the vendor is not supporting the component anymore.

4 – Unpredictability: when you make a change in the system, you have no clues if that change will affect other parts of the code. This is likely to happen with systems that use, for example, instrospection. To better illustrate this, imagine that you need to rename a method that is invoked through reflection by another part of the system. The time that you will spend to track down the bug caused by this change can take hours or even days.

5 – Long list of frameworks, techniques and approaches used in the development. You have to understand all of them to be able to work with the code. This reminds me of “Jack of all trades is a master of none”. While keeping track of trends and technologies is something doable and recommended by experts, keeping track of their details requires time and dedication that we don’t normally have.

6 – Too much time to understand the system as a whole. After several months working on the system, you are still a child when it comes to code knowledge. Since the productivity of the developers is a direct result of how much code they understand, they will probably be frustated to a certain extent.

7 – It is always difficult to use CASE tools focused on quality and/or productivity. How can you build class or sequence diagrams for your application if the code is an unpredictable mess? Even if you have good intentions and try to refactor the application, chances are that the spaghetti code will prevent you from reaching an acceptable state.

8 – The build time can be too long. There are systems that take more than 30 minutes to compile, run automated tests, deploy and startup. This is really bad to the productivity and leads to context switching, which is an evil in software development. The developer gets distracted because it is almost impossible to keep looking at the build process waiting for it to end.

9 – It is almost impossible to replace one technology concept by another. To better illustrate this, imagine that your monster application doesn’t have a well-defined persistency layer (which is common in huge complex legacy systems) and you want to replace your object-oriented database by a relational database. How many places do you have to change to make things happen? How will you make sure that the change was successful without a test harness (automation)?

10 – The last item is a result of the nine reasons above: The bad productivity forces the developers to work more and they will get stressed and tired. Their motivation will suffer and they will probably start to look for another job unless the company has incredible ideas and benefits to overcome these problems.

I know that there are hundreds of exceptions in the real world regarding the ideas above, but my intention is to have a list with the worst cases. What do you think?

Using JGoodies With Other Frameworks

Learn how to combine JGoodies with other backend frameworks in your desktop application. The main problem is the need to create objects that extend the Model class while other frameworks might consider this a problem, either because they require POJOs or provide other specific rules.

If you create GUIs using the JGoodies Binding library, you will probably have to create bean classes that extend the com.jgoodies.binding.beans.Model class.

If your desktop application also uses a framework for other purposes (e.g., persistency) and you plan to use the same model object from the GUI with this framework, then you will have to make sure you don’t have conflicting requirements.

This problem is reasonably common and happens because java doesn’t allow multiple inheritance. So, any framework that is used in conjunction with JGoodies and has rules for the target object (e.g., it must be a POJO), then the implementation starts to become more complex.

Let’s discuss one possible solution for those cases where the other framework requires the object to be a POJO (e.g., Hibernate, JPA, etc.). In such cases, we can create one class for the POJO (attributes + getters + setters) and another class that wraps this POJO, which has similar methods but has the advantage to execute other actions.

Example of a POJO:

public class Student {
    private String name;
    public String getName() { return name; }
    public void setName(String name) { this.name = name; }
}

The POJO above can be used by the persistency framework without problems. Now we need a class to be used by the Binding library (GUI):

public class StudentModel extends Model {
    private Student student;

    public StudentModel(Student student) { this.student = student; }

    public String getName() { return student.getName(); }

    public void setName(String name) {
        String old = student.getName();
        student.setName(name);
        this.firePropertyChange("name", old, name);
    }
}

This isn’t a perfect solution, but solves the problem. One disadvantage is the maintenance required by the two sets of methods that access the POJO, which could be automated by a small piece of code that uses java reflection.

Advantages of the Presentation Model Pattern

This article explains the advantages of the Presentation Model pattern over the Model-View-Controller and Model-View-Presenter. This will improve your decisions about GUI implementations for desktop.

One of the major challenges in the development of desktop software is the effective use of unit tests that cover the GUI functionalities and its interactions with the remainder of the software. The complexity of this implementation lies in the control of selected items in lists and tables, modal dialogs, clicks and events. In fact, it is extremely difficult to develop good tests on the GUI when the application logic is tightly-coupled to UI components.

You probably have already heard about design patterns that could help in this case, especially those that separate the application logic from UI components. Perhaps the most famous is the Model-View-Controller (MVC), which has been widely used not only for desktop applications but also for web development.

There is a relevant question that we should ask ourselves at this point: Is this separation between logic and UI components enough to reduce the complexity of writing GUI unit tests?

Figure 1 presents the three most important presentation patterns for desktop development. Besides the MVC, there is one called Model-View-Presenter (MVP) that consists of a small variation of the first one (see Martin Fowler’s description of them for more details).

patterns

Figure 1: Patterns for desktop application development.

The important thing to notice in this picture is that both MVC and MVP describe the controller/presenter with a reference to the view. So, to create an instance of the controller inside the test code, we need the view as well. This still makes the development of unit tests difficult.

There is a turnaround to this problem, which is basically to add an interface between the controller and the view to break this dependency and abstract the view’s components. But the idea behind this solution increases the amount of code and does not imply in less complexity and clean organization. In most of the cases, this resolution is not worth the effort when there is a third option such as the Presentation Model pattern.

jQuery: Performance analysis of selectors

In this article jQuery is tested with different selectors in order to find specific elements in the DOM tree. The delay of each selector is precisely calculated and the idea is to find out which one is the fastest for the given goal.

jQuery is one of the best javascript libraries I have ever worked with. It is quite simple and usually reduces the amount of javascript code in web applications. Besides all the advantages it brings to the web community, we have to pay attention to a few details when reusing this library in order to get the best part of it.

I will describe a few tips on how to improve the performance of your javascript code. Most of these tips aren’t a big deal if your pages are small and simple. But if you create complex html pages, you should follow them in order to prevent the browser from locking when the page loads up. Even if you are not concerned with performance at all, learning these things will bring benefits to your overall knowledge about this library.

jQuery has a bunch of different selectors – as you can see from the documentation here – and I won’t consider all of them in this analysis. My idea is to explore different ways of finding a specific element in the html page by using different types of search. Benjamin Sterling has already researched this topic here, but I want to add a different point of view, which is more accurate and provides more alternatives for the developers.

Let me start talking about the test html page, which has over 20,000 elements separated in chuncks of 5,000. Basically, there are 5,000 divs + 5,000 spans+ 5,000 paragraphs and 5,000 small tags with the following characteristics:

<!-- 5000 'div' elements -->
Div 0


Div 1

Div 4999

<!– 5000 ‘span’ elements –> <span id=”b-0″ class=”span-0″ row=”b-0″>Span 0</span> <span id=”b-1″ class=”span-1″ row=”b-1″>Span 1</span> … <span id=”b-4999″ class=”span-4999″ row=”b-4999″>Span 4999</span> <!– 5000 ‘p’ elements –> <p id=”c-0″ class=”p-0″ row=”c-0″>Paragraph 0</p> <p id=”c-1″ class=”p-1″ row=”c-1″>Paragraph 1</p> … <p id=”c-4999″ class=”p-4999″ row=”c-4999″>Paragraph 4999</p> <!– 5000 ‘small’ elements –> <small id=”d-0″ class=”small-0″ row=”d-0″>Small 0</small> <small id=”d-1″ class=”small-1″ row=”d-1″>Small 1</small> … <small id=”d-4999″ class=”small-4999″ row=”d-4999″>Small 4999</small>

The 20,000 elements above are generated by javascript. They provide a good laboratory to check the speed of each selector, since we can expect more accurate results in this analysis. The page itself has a few more tags to display information and execute each test, but this shouldn’t affect the final results.

The test page is available here. It takes a few seconds to load because the javascript must create the DOM tree as described above. So please be patient. Note also that each test uses the measure() function, which calculates the delay of the call in milliseconds.

Test 1 – Finding an element by ID

The first test is to find an element by its ID. I decided to get the element whose ID is “d-2642”. We can do this in three different ways:

A – Using the ID selector
$(‘#d-2642’).html()

B – Using attribute search
$(‘[id=”d-2642″]’).html()

C – Using attribute search + tag
$(‘small[id=”d-2642″]’).html()

Running this test for the first time in different browsers, I could reach the results displayed in the following table (in milliseconds). It is clear that the # operator is the most efficient one.

Firefox Opera IE6 IE7 Safari
A 156 0 31 40 0
B 3609 828 2344 841 844
C 578 93 406 210 172

Test 2 – Finding an element by Class

Although CSS classes are intended to be reused among elements, you might create some elements with a unique class name just to identify and retrieve them through javascript. This is exactly what we test in this second test by seaching the element whose class is “p-4781”. We have four alternatives:

A – Using the class selector
$(‘.p-4781’).html()

B – Using the class selector + tag
$(‘p.p-4781’).html()

C – Using attribute search + tag
$(‘p[class=”p-4781″]’).html()

D – Using tag search + filter
$(‘p’).filter(‘.p-4781’).html()

After running this test for the first time in different browsers, I got:

Firefox Opera IE6 IE7 Safari
A 2891 641 1718 631 329
B 453 78 313 180 78
C 422 109 578 201 187
D 203 266 375 210 94

The table above shows case B as the fastest selector for most browsers (except Firefox). It is easy to understand why case A isn’t efficient, since the code has to iterate over all elements of the DOM tree. Case C and D aren’t that bad, but I would say case B should be the preferred one for this goal.

Test 3 – Finding an element by Attribute

The third test is to find elements by a given attribute value. Sometimes this technique is useful and I decided to test it by searching for the element that has “c-3221” as the value of the row attribute. There are four possibilities in this case:

A – Using attribute search
$(‘[row=”c-3221″]’).html()

B – Using attribute search + tag
$(‘p[row=”c-3221″]’).html()

C – Using tag search + filter
$(‘p’).filter(‘[row=”c-3221″]’).html()

D – Using (tag + attribute) search + filter
$(‘p[@row]’).filter(‘[row=”c-3221″]’).html()

Running this test for the first time in different browsers, I could get the following results:

Firefox Opera IE6 IE7 Safari
A 6610 1390 2500 801 1156
B 1250 360 406 200 250
C 1265 968 485 231 281
D 4078 1000 656 320 625

Case B is for sure the best approach to find an element by a specific attribute value.

Conclusions

This experiment was an attempt to find the right and fastest way of finding specific elements in the DOM tree using jQuery. Every jQuery developer should know and understand these details in order to create efficient code. Benjamin Sterling gave the first step in such performance analysis, but I could provide another point of view, which uses a big DOM tree and more alternatives to be checked.

JGoodies Binding API: The Basics

Learn the basics of the JGoodies Binding API, which allows you to separate the application logic from UI components. This can lead to better code and strategic separation of concerns. This is the first relevant step towards the Presentation Model pattern.

The JGoodies Binding API offers a set of classes that helps the applicability of the Presentation Model pattern in java. It was developed on top of the Swing API and has some mechanisms to bind UI components to variables and objects that can be operated independently of their visual representations.

You can download the API from the JGoodies website. This and other libraries are available here. Inside the zip file you will find the source code, the documentation, examples and the JAR file you should add to your classpath to run the examples.

Now let’s study the idea behind this API. There are two basic cases that you must understand:binding components to single values and binding components to lists of objects.

Case 1 – Binding Components to Single Values

In order to better understand this binding idea, imagine that you have a boolean variable that is bound to a JCheckBox. This “connection” means that whenever we change the value of this variable, the JCheckBox reflects this change. This is also true for the opposite direction, so that when we click on the JCheckBox, the variable receives the edited value.

In this same scenario, imagine now that we bind another component to our boolean variable – say – a JToggleButton. Now there are two components that visually display the same value held by that variable. Without surprise, you can realize that whenever the boolean value is changed, both components reflect the new value. Also, if you click either on the JCheckBox or theJToggleButton, the variable and all components bound to it are immediately updated.

This technique is a fundamental step towards the creation of the View and Presentation Model classes in the Presentation Model pattern, where the UI components are kept in the former, and the variables that describe the GUI state, in the latter.

In practice, components that can be bound to a single value are those that display a single value on the screen. This includes: JLabel, JTextField, JTextArea, JCheckBox, JRadioButton,JPasswordField and JFormattedTextField.

To connect these components to a variable, we need an implementation of the ValueModel interface (package com.jgoodies.binding.value), which holds a value and keep it synchronized with the value displayed by the component. Therefore, we can change the value held by theValueModel and the component will reflect this change. In the same way, if the user edits this value through the GUI, the ValueModel will receive the provided value.

public interface ValueModel {
    Object getValue();
    void setValue(Object o);
    void addValueChangeListener(PropertyChangeListener propertyChangeListener);
    void removeValueChangeListener(PropertyChangeListener propertyChangeListener);
}

There are two ways to connect a ValueModel to a UI component. The first one is to use the static method bind() of the Bindings class (package com.jgoodies.binding.adapter):

JTextField textField = new JTextField();
ValueModel valueModel = new ValueHolder();
Bindings.bind(textField, valueModel);

Notice that we create a ValueModel using the ValueHolder class, which is the implementation that we need for this case.

The second possibility is to use a convenient class called BasicComponentFactory (found incom.jgoodies.binding.adapter), which has methods to create the components with the binding idea in mind:

ValueModel valueModel = new ValueHolder();
JTextField textField = new BasicComponentFactory.createTextField(valueModel);

It is important to remember that whenever we bind a UI component to a ValueModel, the former must understand the value held by the latter. Therefore, we can connect without problems aJCheckBox to a ValueModel that holds a Boolean object, but NOT to a ValueModel that holds aDate. If the ValueModel receives a value that cannot be handled by the component, it will throw an Exception.

Case 2 – Binding Components to Lists of Objects

The second type of binding that we can address with the JGoodies API is useful to handle lists of objects that must be displayed on the GUI. In this case the following components can be used:JComboBox, JList and JTable.

The list of objects is represented by the javax.swing.ListModel interface, which provides:

– access to the objects in the list;
– the size of the list;
– capability to observe changes in the list.

public interface ListModel {
    int getSize();
    Object getElementAt(int index);
    void addListDataListener(ListDataListener l);
    void removeListDataListener(ListDataListener l);
}

Since this interface belongs to the Swing platform, the JGoodies’ contribution was two implementations that keep things as simple as the java.util.List interface: ArrayListModel (which inherits from ArrayList and implements ListModel) and LinkedListModel (which inherits fromLinkedList and implements ListModel).

As you can notice, the ListModel interface is not aware of selected objects in the list. This is actually good because in practice there may be lists where only one object can be selected at a time and others where multi-selection is desired. Thus, the ListModel alone does not solve our binding problem.

For lists of objects that can have only one object selected at a time, we can use theSelectionInList class (com.jgoodies.binding.list package). For lists that accept multi-selection, there is no generic class to handle this situation – this will be the subject of another article.

The SelectionInList class is basically a wrapper for a ListModel and a ValueModel. TheValueModel is used here to hold a reference to the selected object in the list. Let’s se how is can be used:

ListModel listModel = new ArrayListModel();
ValueModel selectedItemHolder = new ValueHolder();
SelectionInList selectionInList = new SelectionInList(listModel, selectedItemHolder);

We can bind a SelectionInList object to a JComboBox using an adapter:

JComboBox comboBox = new JComboBox(new ComboBoxAdapter(selectionInList));

We can bind JLists using the same component factory explained before:

JList list = BasicComponentFactory.createList(selectionInList);

The case for JTables is a little bit more complex because we need a TableModel implementation with defined columns.

Here is the source code of an example: https://www.dropbox.com/s/z5e3xouoqzdrawh/JTableBinding.zip?dl=0

Easy way to detect clutter in User Interfaces

Learn the screen scratch technique to easily identify visual clutter and noise in user interfaces.

There is an easy technique to identify visual clutter in GUIs that I would like to share with you. It is so simple that everybody can apply it quickly and everywhere. The technique is called Screen Scratch.

As you might have noticed, UI toolkits like Swing, AWT and SWT (among others) paint their components using colors that emulate a pseudo-3D image and produces a depth impression on the screen. This is exactly what we explore with this technique.

Imagine that your fingers could feel these 3D levels while you move them along the screen: how deep would your fingers vibrate? If you could “feel” a high degree of vibration, chances are that the screen is cluttered and needs to be revised. On the other hand, if you could notice just a few levels of depth, the screen is probably well designed and there is no visual noise.

It is important to remember that the goal of this technique is to identify components, borders and lines that should not stay together and were added by some developer without UI design skills. As a first example, take a look at a software tool called wGetGUI. Its screen is so cluttered that we would feel it as a piece of sandpaper.

wgetgui_simple
Figure 1: Two possible arrangements of the same panel

With this technique we can easily spot the clutter on the UI due to the excessive number of borders and nested panels.

In general, the only borders that should be left on the GUI are component borders, since they bring important information to the users. Therefore, don’t try to change or remove them unless you know what you are doing.

Another point to which we have to pay attention is the emerging GUI styles available everywhere. Have you ever seen those beautiful shiny and glossy components that bring a soft and elegant UI to almost any software?

elegant 
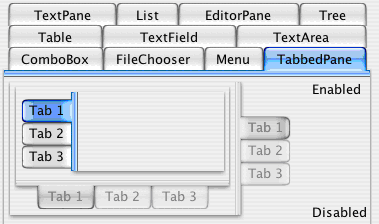
Figure 2: Elegant Look-and-Feel with glossy components.

Components like the ones above would make our nails slide smoothly on the screen and this could be a problem to this technique. In this case, pay special attention to borders and other lines that are too close to each other. In fact, this is something that cannot be easily disguised even when the appearance of the components are well designed. Take a look at the nested borders of the JTabbedPane components above. Okay, this is just a demo app, but it should be clear to everyone that it contains lots of clutter.

What is the Presentation Model pattern?

In this article I explain the Presentation Model pattern, its structure and layers.

Presentation Model is a design pattern used to build desktop GUIs with a clean separation of concerns. One of the most important advantages of this pattern is the easy creation of unit tests that can focus on the application logic without touching UI components. In fact, this is a goal that many other patterns have failed to accomplish. Read the advantages of the Presentation Model pattern for more details.

The first characteristic of the Presentation Model pattern that you have to understand is how its classes (often referred to as layers) are organized. Figure 1 shows its structure, which details the following classes: view, presentation model and service layer. Before explaining each of them, pay special attention to the references (arrows) and notice that the class that holds the state and logic of the GUI (presentation model class) does not have a reference to the view. What happens is exactly the opposite: the view that has a reference to this class.

Let’s understand the role of each of these classes in the pattern:

  • View: Simple class that contains the UI components. The displayed data reflects the state kept by the Presentation Model class.
  • Presentation Model: Class that holds the state of the GUI and its logic. The code operates on data and variables in memory and is unaware of the existence of UI components and presentation formats.
  • Service Layer: Class that represents a channel between the Presentation Model and the outer world, where different types of service might exist (e.g., EJBs, databases, etc.). What lies beyond this layer is not seen by the Presentation Model class.


presentationmodel

Figure 1: Three layers of the pattern

The Presentation Model class has no idea about views. It simply holds the state of the GUI and fires events when this state changes. Moreover, it is possible to attach more than one view to a presentation model instance, which leads to diferent visualizations of the same data.

The separation into decoupled layers and different responsibilities brings important advantages to the GUI implementation and maintenance. When we work this way, the layers become thinner and Ö consequently Ö more simple, which increases the understandability of the code. Besides that, the operations with models and business rules happen only in the presentation model layer, where the unit tests can reach efficiently.

The Presentation Model pattern applied without a framework requires some synchronization code between the layers (see the articles on the JGoodies Binding API).